Adding Routes to a MapifyPro Map
PrettyRoutes can be used in conjunction with the MapifyPro plugin. Instead of using PrettyRoutes maps, you can set up your map using MapifyPro. Below are the steps:
-
Navigate to Routeswithin thePrettyRoutesProplugin, then click 'Add New'.
-
Assign a name to your Route.
-
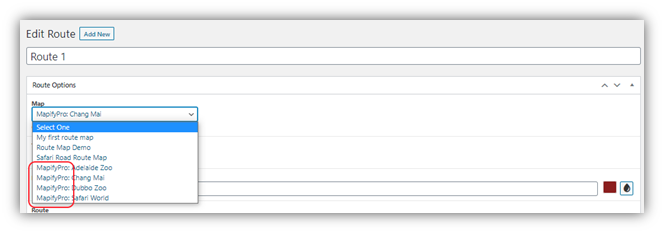
From the Map dropdown list, choose a MapifyPro map instead of a PrettyRoute map. All MapifyPro maps are available in the Routes page’s dropdown where you can select a map to add a route to.
-
Add the 'From' and 'To' locations, and waypoints as preferred, to complete the setup.
-
Options to customize your Route (e. g. display pinpoint, enable tooltip, close tooltip automatically/manually, add tooltip name and image) are found on the lower section of the page. For further details on this, please refer to Adding Routes to a Map Using the PrettyRoutes Plugin
-
Click 'Publish' to save your Route.
-
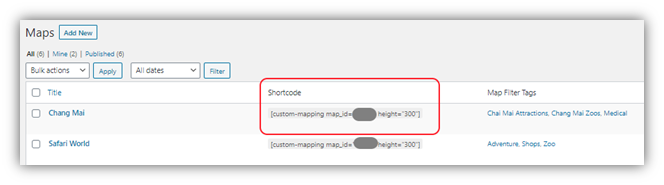
When adding your Route Map to your website or page, you will use a MapifyPro shortcode to place the map instead of the PrettyRoutes shortcode. The MapifyPro shortcode looks like this:
[custom-mapping map_id="1783" height="300"]
This code is found on the MapifyPro map list such as the one below: